Content below covers how you can care for your product. There are also some useful tips for installing hanging organizers that use snaps and other fasteners. Please let us know if you have any questions!
Care and Feeding Instructions
- Waxed Canvas: Sailrite is our primary supplier of waxed canvas (note that we use their lightly waxed products which do not contain bees wax) and they have an excellent page on how to take care of waxed canvas. We can’t say it better ourselves, so please see their instructional page: www.sailrite.com/how-to-clean-waxed-canvas
- Sunbrella Canvas: Sunbrella is the standard in UV resistant fabric in the marine world. Please see their website for care and feeding instructions: www.global.sunbrella.com/en-us/how-to-clean
- Clear vinyl – Strataglass: We only work with Strataglass which is the highest quality in clear vinyls. For care and feeding – please see their website: www.strataglass.com/care-and-maintenance
Installing Wall Studs for Hanging Organizers
The hanging organizers we make are often secured with conventional button snaps. These are essentially sockets and they ‘snap’ onto a stud that is screwed into a wall. Lining these up can be tricky as usually the fabric obscures the correct placement. You may already have a favored DIY strategy for dealing with this – but below is our favorite approach when dealing with two fasteners. We basically make a stencil with painters tape.
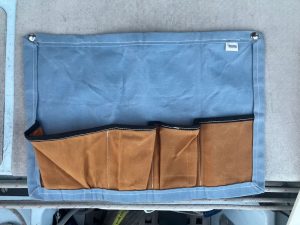
1. Organizer we intend to hang, note two upper snaps
2. Turn over, flatten as much as possible. Stretch painters tape across the width sticky side down and then trace the edge of the snap with a sharpie on the tape.
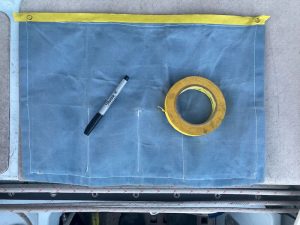
3. Transfer tape to mounting surface, make sure it is level and where you want it, screw in studs through center of your marks, remove tape.
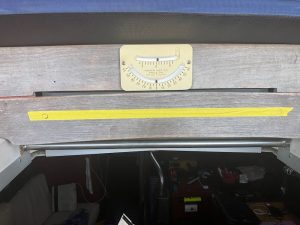
And of course, we are missing the final picture above of the installed items, but hopefully you get the picture! The studs will have wood screw bases and can be screwed in with a Phillips screw driver. You should not need a power tool to screw in the stud, however drilling with a small bit to start a pilot hole can be a good idea.
Other approaches abound
- Make your marks with the fasteners themselves: You can also connect the studs to the snaps and use the sharp point of the stud screw to mark the mounting surface, then remove and screw in the stud (a flat head screw driver can be helpful to pry the snap and un-mounted stud apart).
- Make your mark by transferring some sharpie ink: A less permanent marking approach can also be done by tracing the snap edge multiple times with a sharpie and then quickly pressing that against the mounting surface.
- Make your mark with some gummy stuff: Gummy adhesive (like poster tac or even gum) can be put on the mounting surface and you can press the snaps in. Then drill right through the center of those marks.
- Use a large sheet of clear plastic (great for multiple fasteners): If you have four snaps to install – we recommend a large sheet of transparent plastic that spans the whole piece and tracing the sockets, much like the painters tape approach. Be sure it is totally flat. You can then tape this to the wall, install the studs, and then tear the plastic away.
If you have a favored approach that isn’t listed here, please share and we will post it!